
Upgrading Lesley
Lesley is the diesel locomotive shunter based at the Chiltern Railways depot in Aylesbury. It was the thorn in the side of a busy maintenance department until Jack, one of the apprentices got his hands on it.
My name is Jack, I’m a fourth year apprentice at Chiltern Railways based in Aylesbury.
Lesley is very much needed at the depot and gets used a lot. Predominantly it is used to shunt the unpowered mk3 coaches into the depot to avoid having to use the DVT or 68 locomotive trains. But Lesley had a major issue…
It was taking around 4 hours to preheat Lesley’s engine block to 50 degrees. Below that temperature the locomotive won’t start so the planning involved when wanting to use Lesley was having a direct impact on maintenance at the depot. Having to plan 4 hours in advance of wanting to work on the coaches was not sustainable and finding a solution was needed to improve efficiency and gain better time management.
As with a lot of older machinery, Lesley had suffered from many years of neglect and needed an overhaul so the depot asked me to solve the problem. It suited me as I’m drawn to old machinery and love to get things working again. I work on old cars in my spare time and I was keen to get the right, updated components onto the locomotive to make it healthier and working in a more efficient way.
So what was wrong with Lesley?
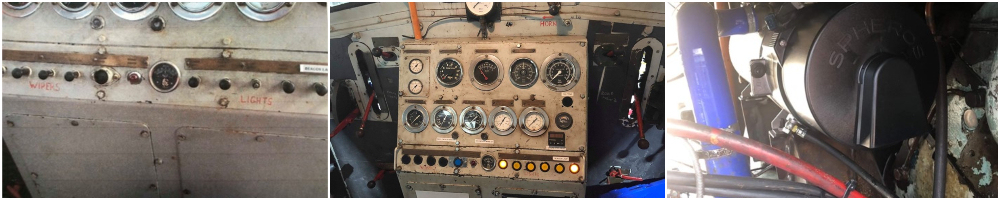
The wiring and control panels were in a poor state due to the pull switches being out dated and causing a high resistance. The plastic around them was brittle and falling apart therefore an update and modernisation was required - you cannot operate the locomotive if the control features simply don’t work.
The old pre-heating system was also an issue. It was originally designed for a car engine block which is significantly smaller than Lesley’s engine, meaning the system was struggle to get up to temperature. With a pre-heat of roughly 50 degrees required, this original system was taking forever to do its job. Add into this it’s poor state of repair, an untidy terminal box with wiring that resembled a bird's nest, a pump that no longer functioned at full capacity and worn pre-heater brackets - I had a lot of work to do to get Lesley to a fit state.
Solving Lesley’s issues
I started by modernising the interior cab, updating all of the pull switches that operate the lights and window wipers to push button switches. I installed a proving light to stop us having to get out of the vehicle to see if they are all operating - if it’s not lit then it’s not getting any power to the component and isn't working. Once this job was complete there was less resistance to the components meaning the lights now shine brighter and more efficiently – a big improvement already.
Next I moved onto the aux heater and pre-heater for the engine block. I found that the pre-heater needed to be bigger and more efficient. I decided on which model I was going to use and found I was able to utilise a lot of the existing components and incorporate them into the new aux heater. I removed the old one and began to look at the mounting position for the new aux heater. In the end I chose above the fly wheel as there were existing mounting points here which meant I only needed to fabricate something to adapt the UNF fittings to metric to fit the new aux heater. I also needed to raise the aux heater up because the exhaust was underneath. I chose this position because it was dead centre to all of the coolant pipes and flanges. It was a good position in terms of fuel supply and also a good distance away to mount the diagnostics unit and terminal box, avoiding the need to run long wires. I made up the brackets and the aux heater fitted straight on.
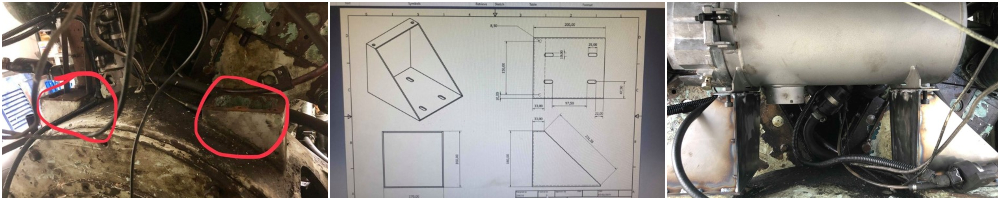
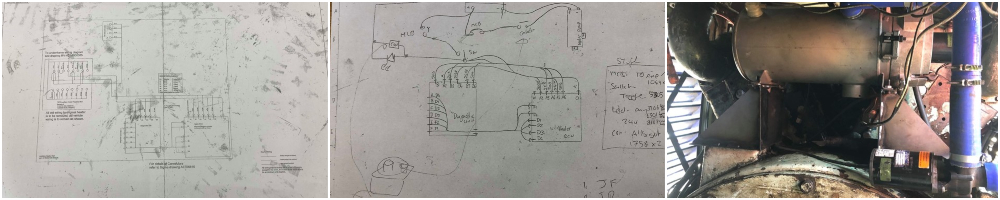
I had the aux heater mounted so it was onto designing and sorting out the wiring for it. I took the original drawing diagram that someone had made for the 165 aux heater modification kit and I adapted it to be able to run onto Lesley. This was checked by one of the technical staff at Chiltern Railways, providing me with the evidence and drawing instructions to wire in the aux heater.
The old fittings would have to go, they weren’t the same size and would bottle neck the coolant to the new aux heater and water pump so I got the old flanges recreated with a bigger fitment for the coolant pipes. I drained all the coolant out of the system and sent the flanges off to be remade. Once back I made a new gasket for the two faces to mate and made sure the joints weren’t going to leak.
I then moved onto the old fuel lines. I kept the T piece brazed into the fuel line but took away the old brittle pipes, replacing them with proper fuel lines and olives to ensure a tight fitment and no leaks of fuel to the aux heater filter.
Next, I found that when I was starting Lesley with the new aux heater the starter motor kept frying itself. After investigation I found the cradle on the starter motor was cracked and the engagement of the pinion wasn’t going in straight, catching and jamming which was causing it to fry. Fortunately, there was another one in the country which I got and install. That however is only a temporary measure and I plan to take away the cradle and install the starter motor straight onto the fly wheel housing. This will mean it doesn’t have any movement or play when operating and the starter motor is more intelligent, only turning the engine over once engaged rather spinning while trying to engage.
The battery charging was also an issue with the shunter originally having a dynamo fitted that was only charging the batteries at 25 amps. This wasn’t enough to charge the batteries which require roughly 80 amps output from the alternator so I’ve had to jump start Lesley a few times. The solution will be to install a new alternator to ensure that when the shunter is running it will easily charge the batteries up. I’m aiming for roughly 120 amps output compared to the 20 amps provided from the old dynamo.
The new Lesley
After the many problems and issues that I encounter, I was pleased to see my hard work pay off and the new Lesley immerge.
The aux heater looks great situated in Lesley. It’s neat and the time I took to measure and double check everything means there were no problems with the installation.
The project generally was a big success. I modernise and improve the efficiency of the shunter and it now runs much better. In terms of efficiency, I reduced the start time from 4 hours to 15/20 mins depending on the environment temperature. This has improved the time management of the vehicle and the efficency saving for the depot has more than paid for the cost of the improvement work. Now the mk3 coaches can be worked on quickly and efficiently, getting them back onto the tracks quickly!
The future for Lesley
I’m looking at ways of installing new updated systems onto Lesley to improve the efficiency further. For example, automating the timed purge contactor for the water pump would take away any human error that may occur.
I’m really happy to have been able to work on Lesley and improve its life for many years to come.
Written by Jack, ETT and Chiltern Rail Apprentice